
Making a Cloud Tank
How to Build and Use a Cloud Tank
Setting up a cloud tank does take some time and patience. Still, the good news is that most of what’s required are everyday items that you can get at your local supermarket, and they’re pretty cheap as well.
NOTE:
This guide relies heavily on the information provided by Scott Squires on how he created the original cloud tank for Close Encounters of the Third Kind. We used Scott’s blog post to design our first cloud tank and capture our collection of cloud tank footage, and we have learned a lot of practical knowledge since.
Here’s a list of what you’ll need to get started:
- Aquarium or another water tank with at least 1 glass/transparent side
- Epsom salt, rock salt, or any other cheap salt
- A thin sheet of plastic such as a painter’s “drop cloth.”
- white ink, paint, or milk-like substance
- water hose
- in-line water filter
- an insecticide sprayer or a large syringe and tubing
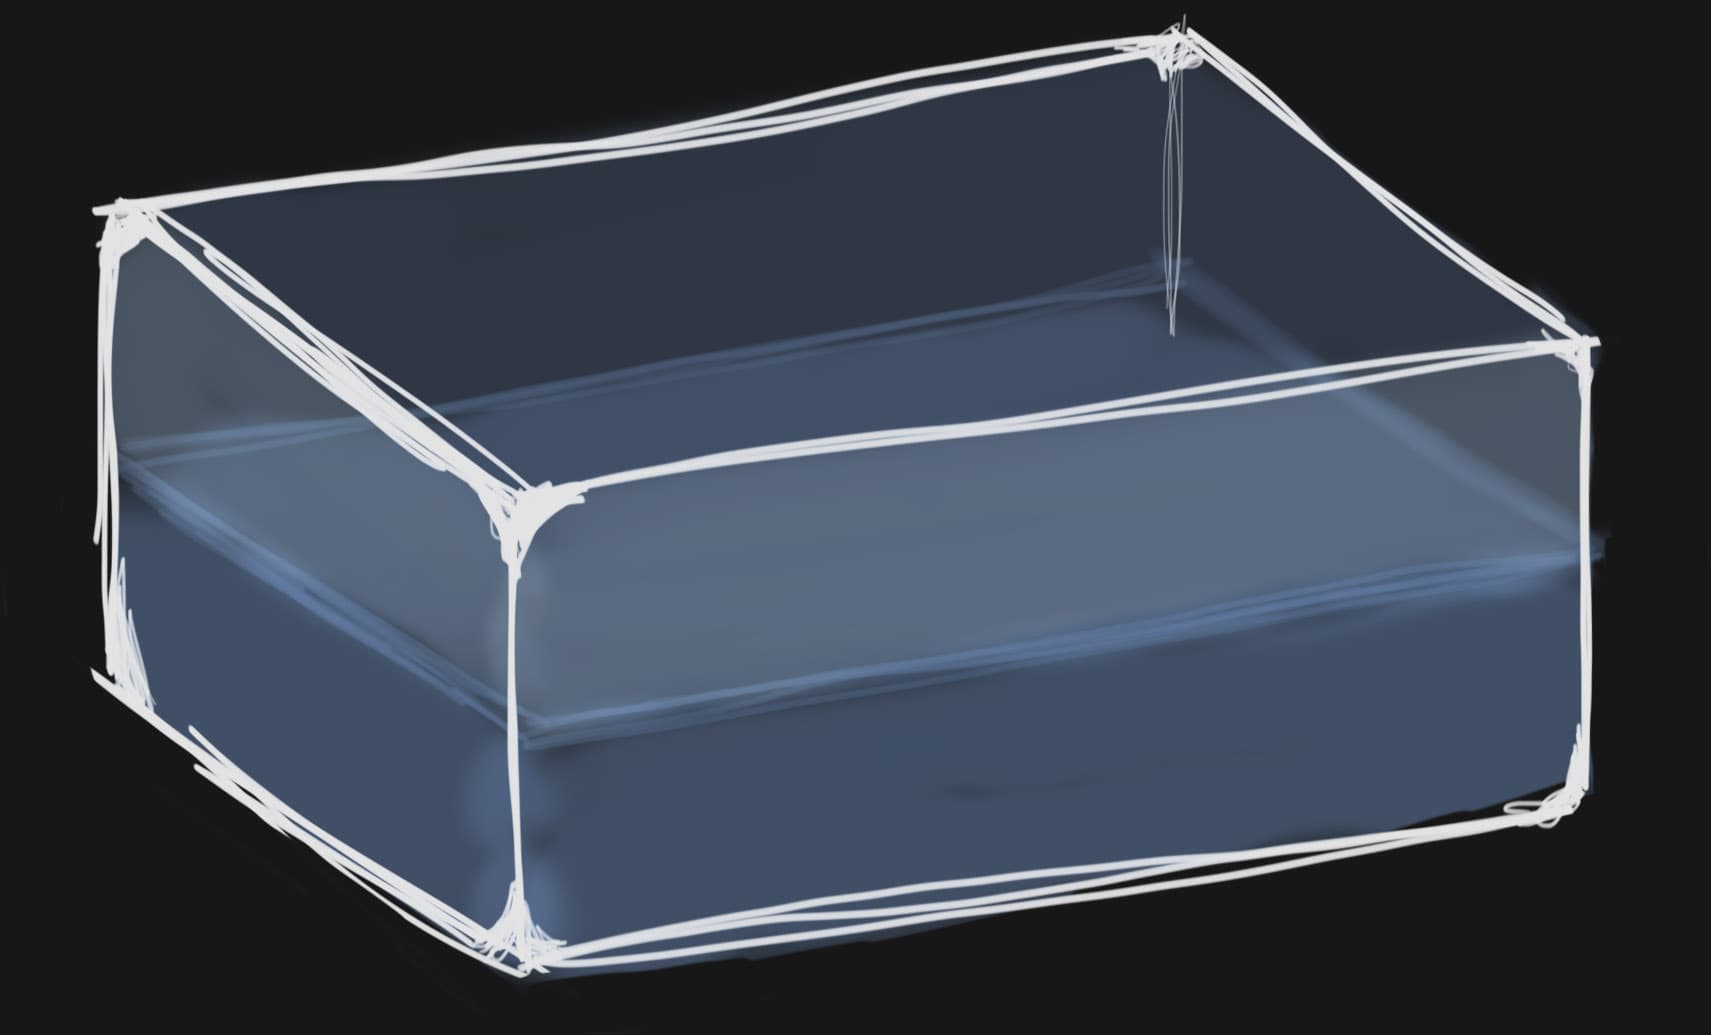
Obviously, we have to have something to hold the water and a clear side so the camera can see the clouds. The aquarium can be as large or as small as you like. Still, the size should probably be at least 10 gallons (about 40 liters) to achieve somewhat believable results.
For reference, the cloud tank used by Squires and Douglas Trumbull for Close Encounters of the Third Kind – and later Raiders of the Lost Ark and Poltergeist and virtually all ILM films of the 80s – was a 2000 gallon glass tank approximately 7ft wide x 7ft long x 4ft deep. That’s a large setup but not that unusual for a studio project.
This is how we create salt water.
This can be anything from a trash bag to a sheet of plastic used by painters, the most important thing is that it is thin and clean.
This is what will create your clouds. The choice is yours, so feel free to experiment. There’s no wrong answer.
To fill the tank.
If possible, it’s best to filter the water that will fill the tank.
To inject the "clouds" into the tank, you’ll want to use some kind of tube or wand that will provide a minimum level of control.
Preparing the Cloud Tank
Ok, so now that we have our aquarium and other materials, here’s the process of preparing the cloud tank:
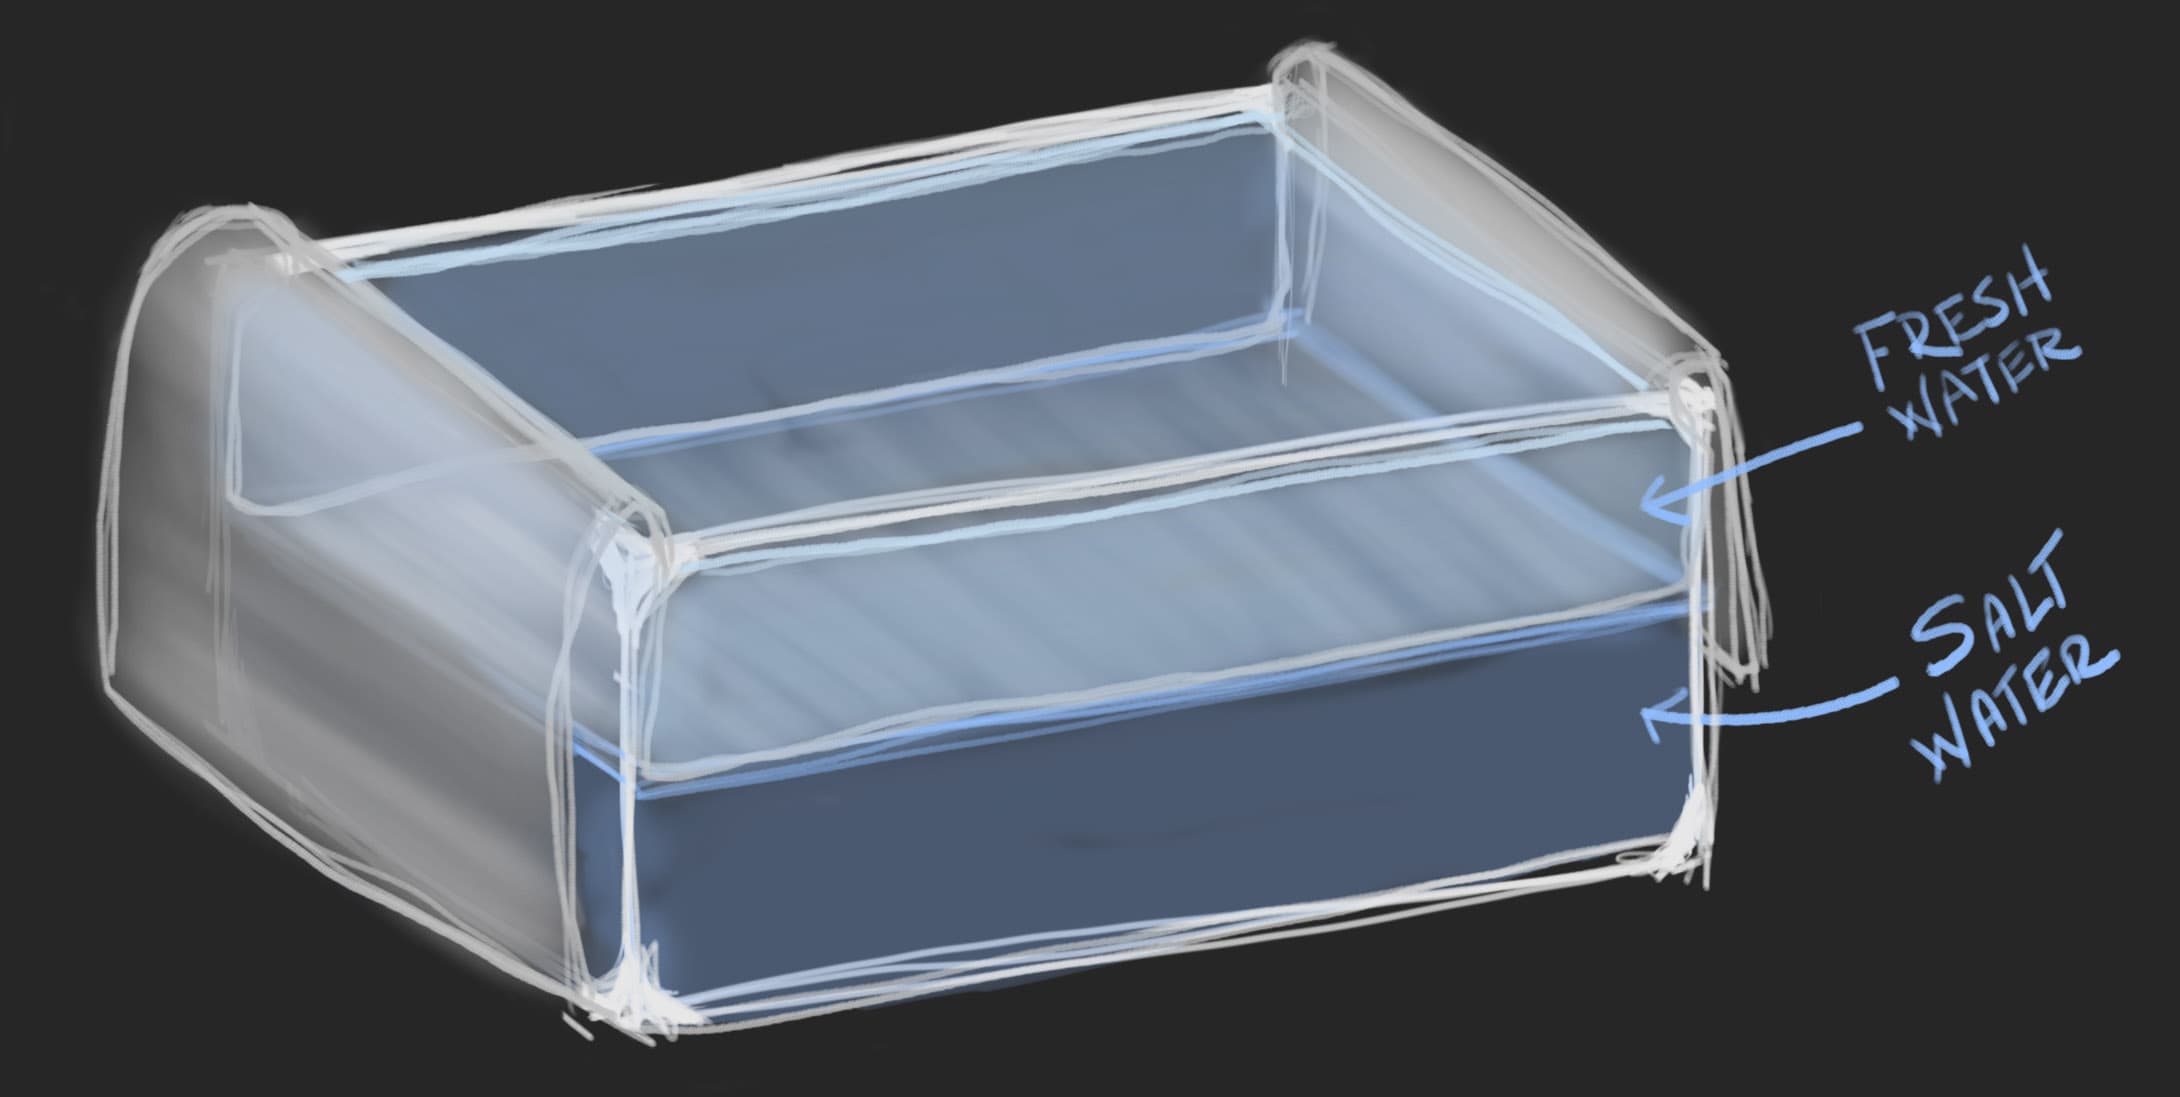
1. FILL THE AQUARIUM HALFWAY WITH A SALT WATER MIXTURE
To start, we’re going to create a salt water mixture. In theory, if you live near a saltwater body of water, such as the ocean, you could use that water. But honestly, you’d probably spend more time filtering your water than we’ll spend creating a salt water mixture.
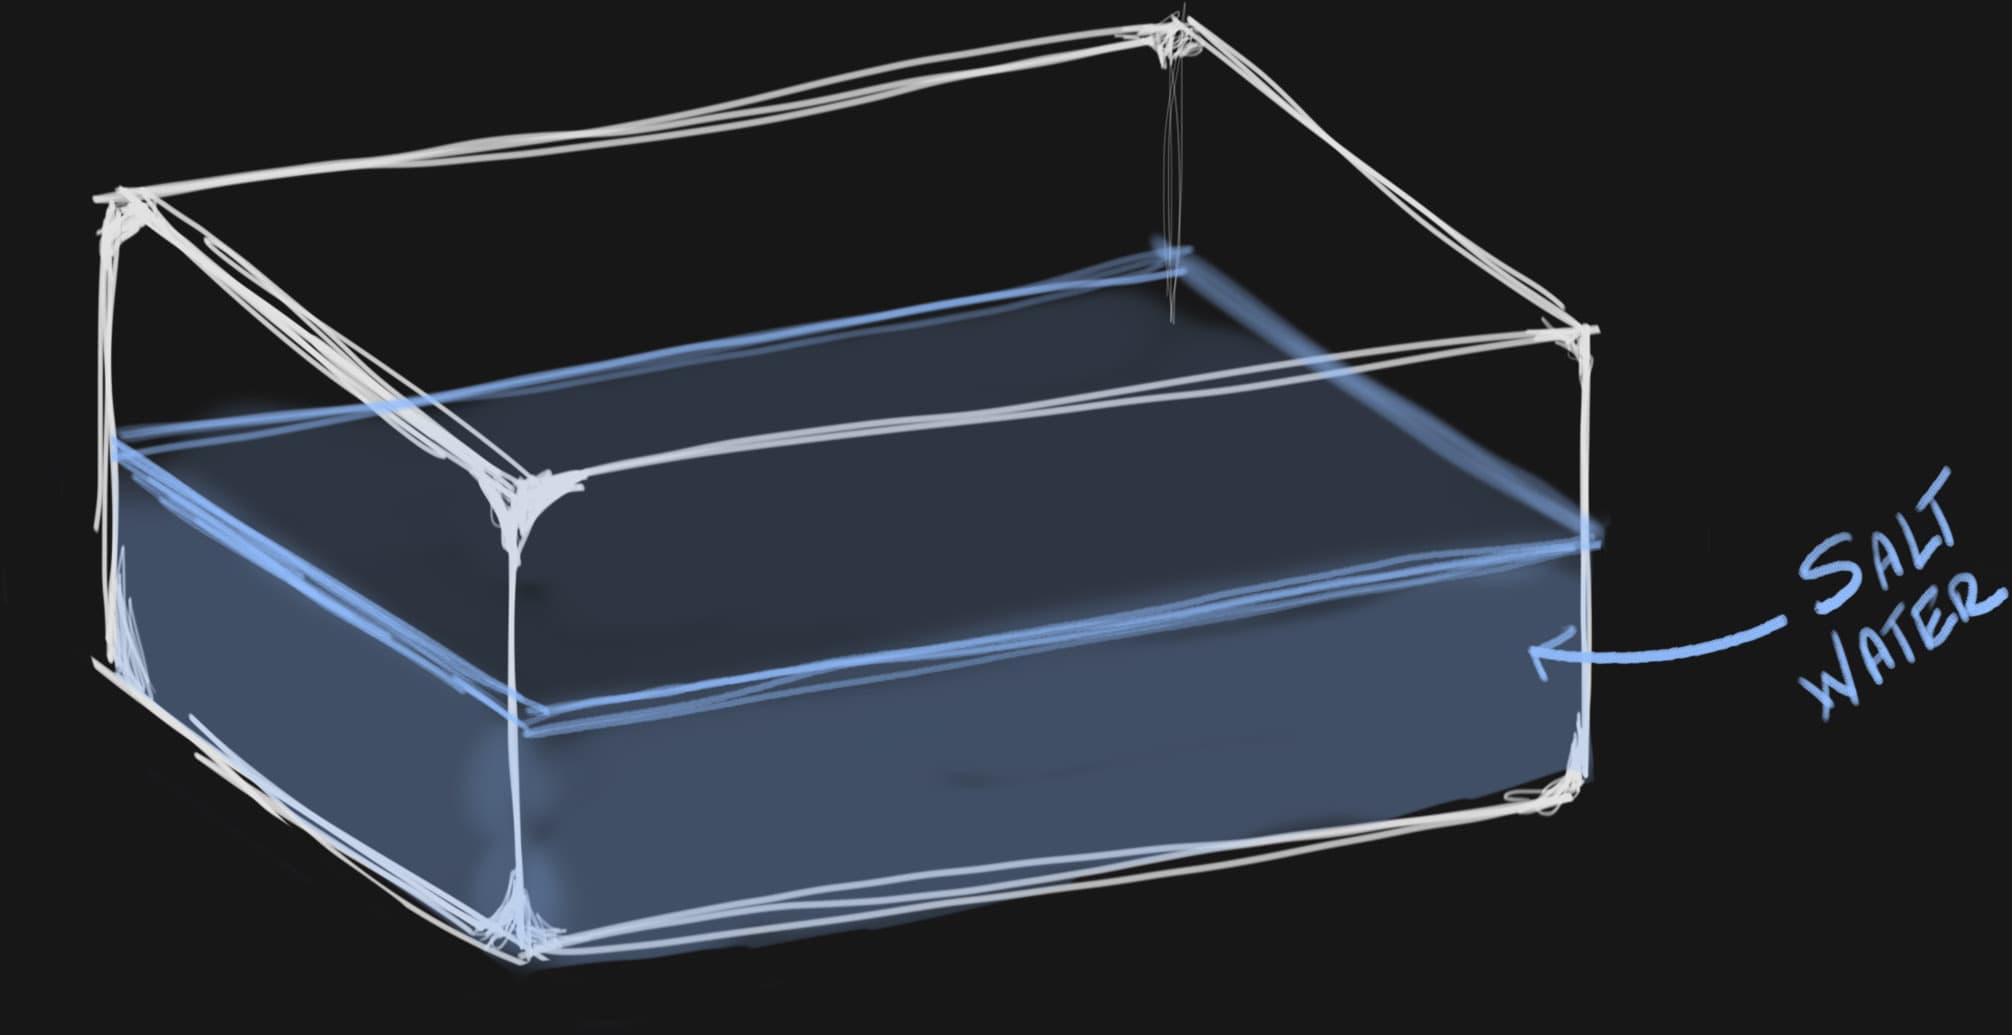
Any salt will work, we’ve generally used Epsom salt, but rock salt will work just fine. Whatever salt you decide to use, you’ll want to ensure that you’re taking precautions to filter out any dirt or other impurities. Otherwise, that could add cloudiness to the tank before you’ve even really started. Table salt would also work, but the cost would be very high.
How much salt should you use?
That depends on your overall tank size. We want to achieve a density similar to seawater (perhaps a little heavier), which is 3.5% salt to 96.5% water. Given this, here is the ratio that we would recommend:
- For every 10 gallons (40L) of water, you’ll want to add 4 lbs (1.8kg) of salt.
So for a 10 Gallon tank, that means that you’ll likely want:
- 5 gallons of salt water
- 5 gallons of fresh water
Thus, we’ll need about 2 lbs of salt to add to the bottom layer to achieve our salt water layer.
Premix the salt water
To create your salt water mixture, you can benefit from mixing the Epsom/rock salt in small concentrated batches beforehand. For example, you can heat a pot of water on the stove and mix in your 2lbs of salt, stir, and allow it to be wholly absorbed into the water. You could even use a blender or other kitchen tools to speed up the process if you like – just please don’t add boiling water to the blender! Then put that concentrated salt water mixture in the refrigerator to cool it down.
Note: Ideally, you would do this the day before to allow the water to cool down completely. We want the bottom layer of water to be as cool as possible so that the temperature doesn’t counteract the separation layer technique.
Add the concentrated salt mixture to the tank and fill the tank halfway with tap water to complete the salt water layer.
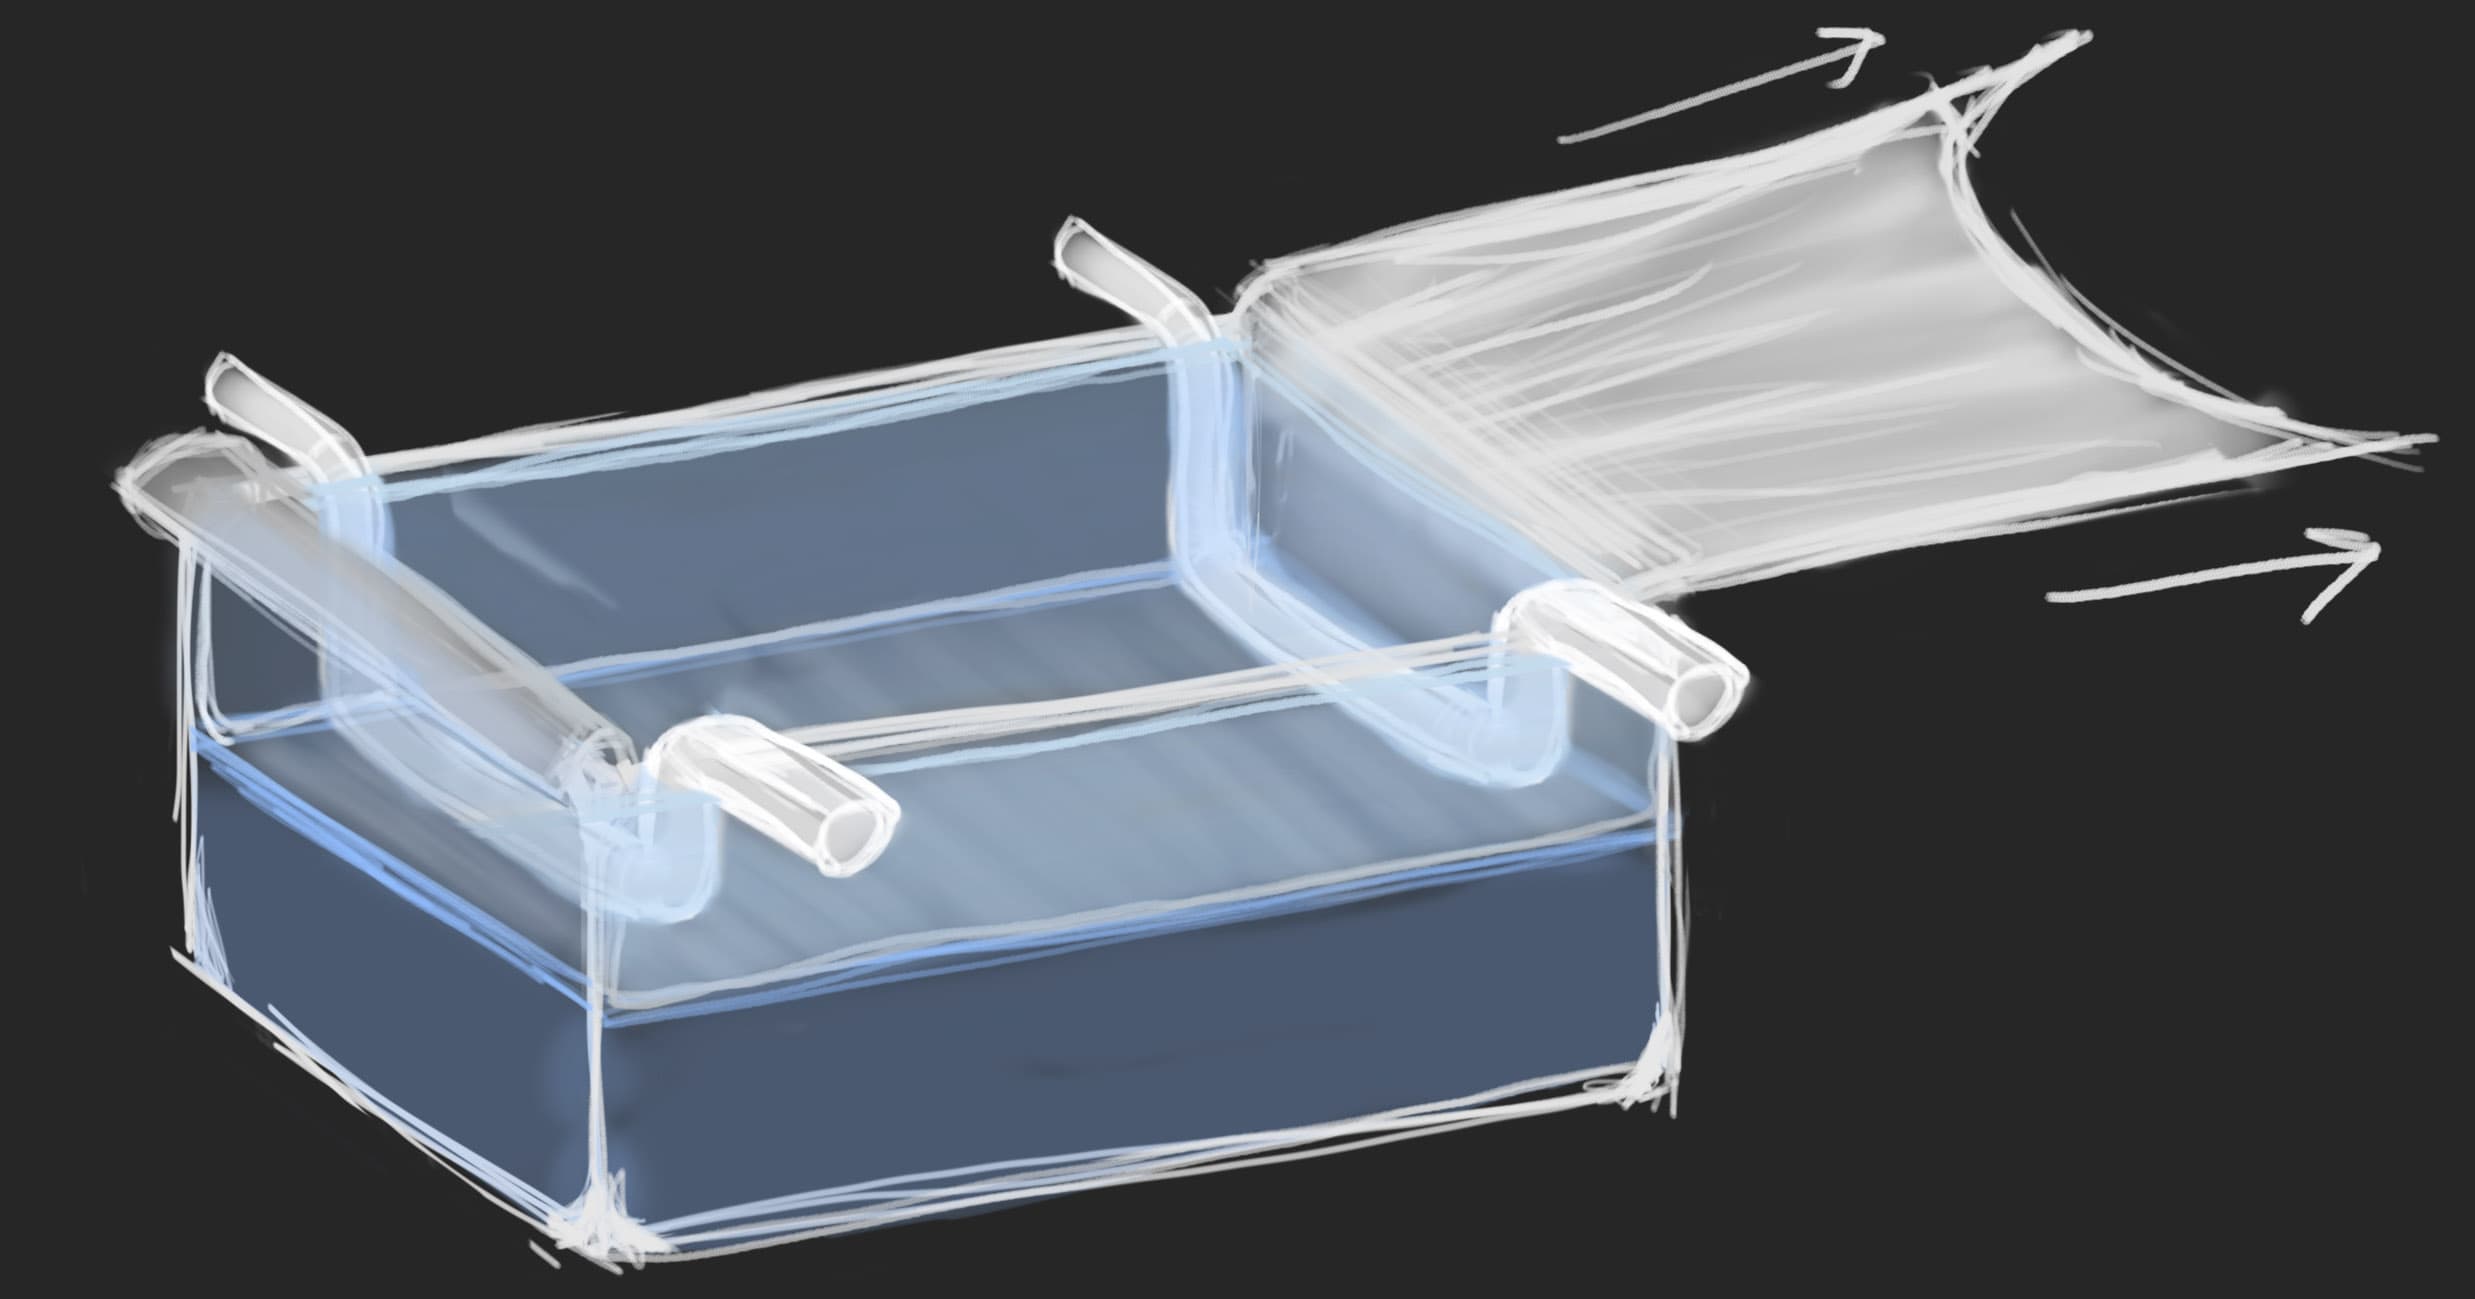
2. PLACE THE THIN SHEET OF PLASTIC ON TOP OF THE WATER
Now we want to add a protective layer of plastic on top of the water. This layer is simply a physical barrier to keep the salt water undisturbed while filling the rest of the tank with tap water.
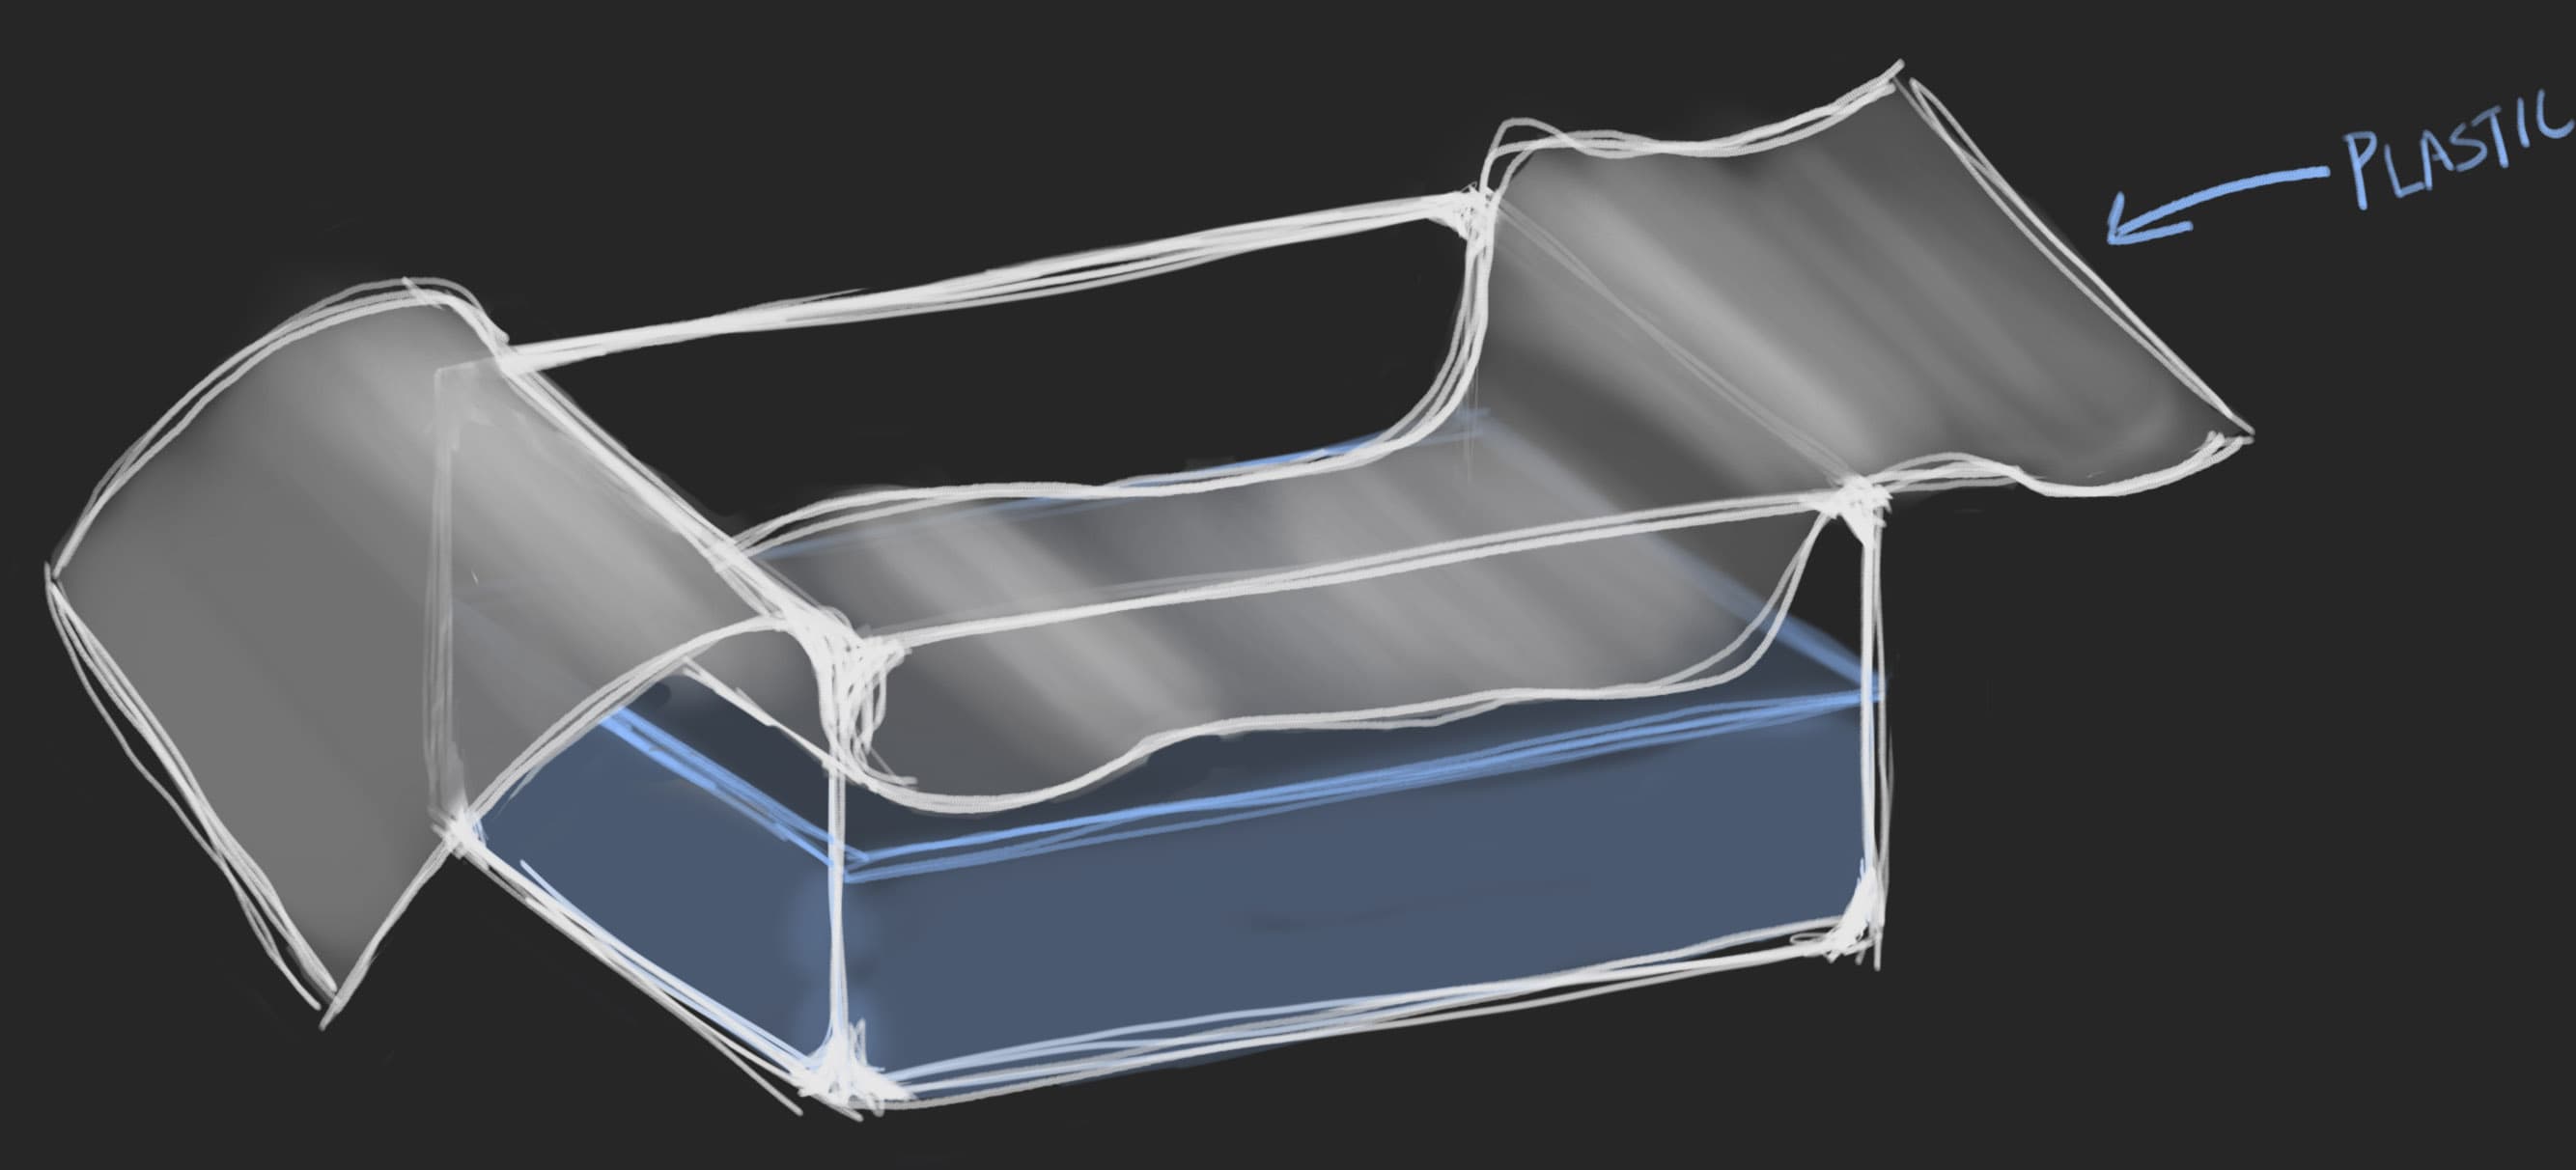
Pretty much any lightweight sheet of plastic will work as long as it meets a few requirements:
- It is clean
- It is big enough to cover the entire surface of the water
- It is flexible enough that it can be removed without destroying the separated layers
With the plastic in place, clamp it or tape it to ensure that it will remain in place for the next step.
3. FILL THE REST OF THE TANK WITH FRESH WATER (WARM WATER IF POSSIBLE)
With the plastic sheet in place, return the hose to the tank and resume filling. Take it slowly. You don’t want to put too much stress on the sheet of plastic.
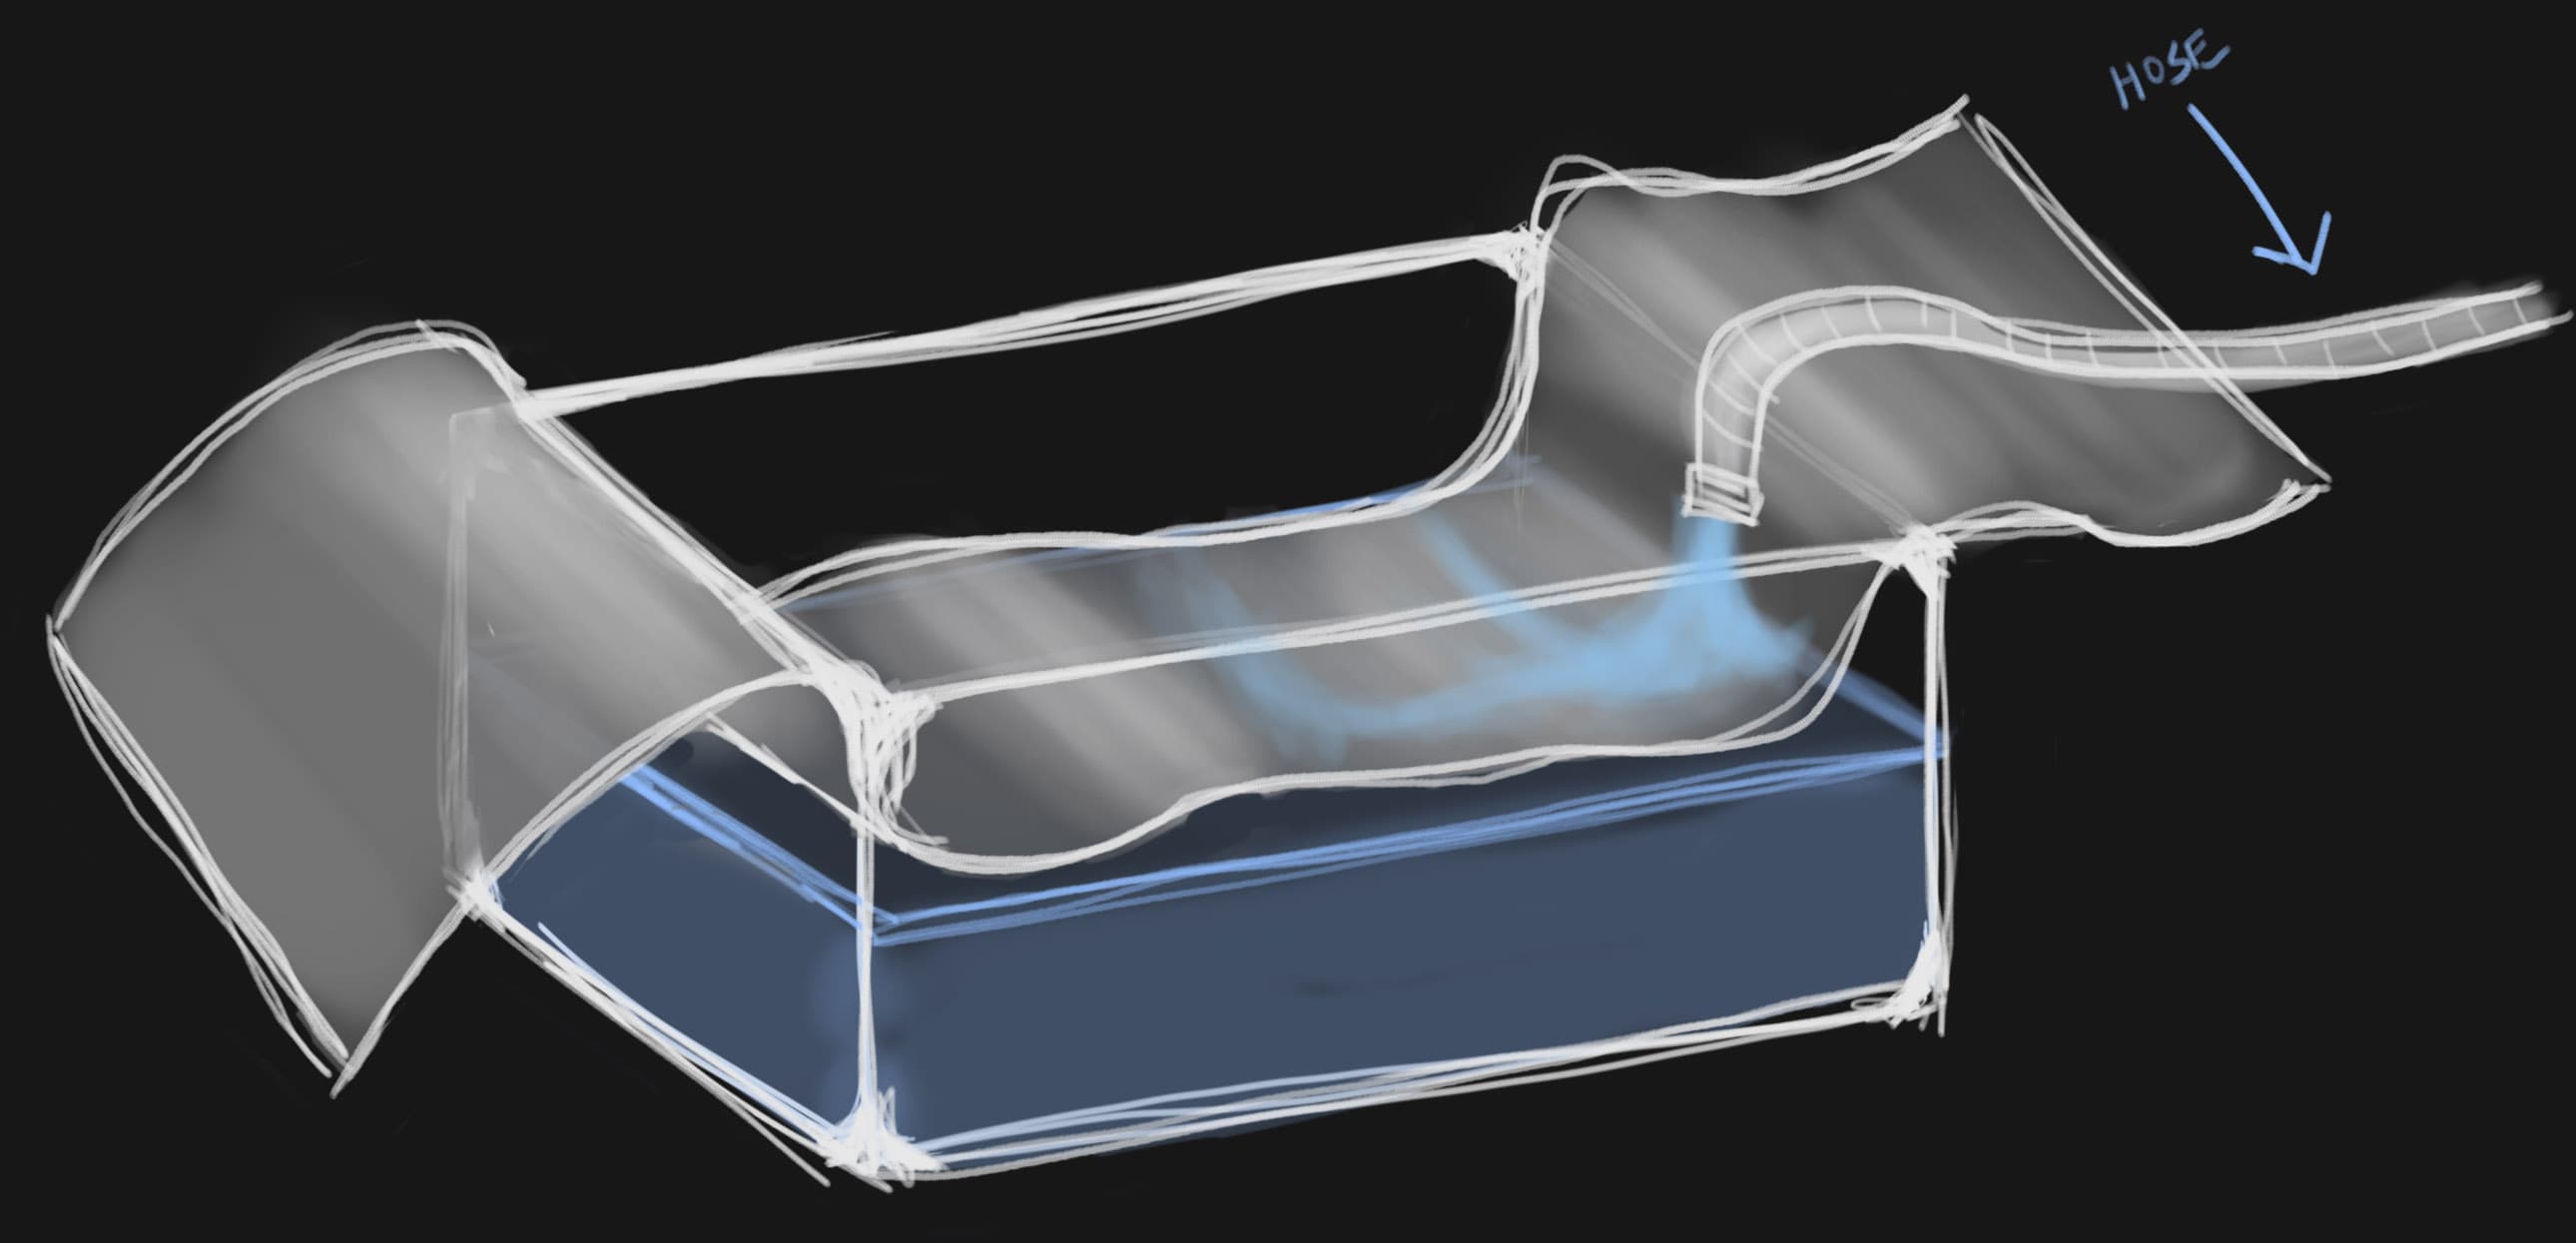
If possible, adding warm water is desired as the separation layers will benefit from a temperature difference in addition to the density difference.
4. SLOWLY REMOVE THE SHEET OF PLASTIC
Once the tank is completely filled, remove the hose and, carefully, slowly remove the sheet of plastic.
ProTip:
With some simple, lightweight PVC pipe, you can build a “U” shaped rig that will aid in your later removal of this sheet of plastic. With this barrier setup, when you pull on the plastic sheet, the PVC will hold it down and keep it horizontal. This way, it will stay at the level of the separation point and prevent it from dumping the upper layer of water into the lower layer.

Think of it like the magician’s tablecloth trick. If you lift the tablecloth up all the dishes will be tossed off the table and fall to the ground. But if you can pull the tablecloth horizontally, it’s possible to remove the tablecloth and leave the dishes in place. However, in our case, speed is not our friend. So take it slow and do your best to create as little disturbance as possible.
5. ALLOW THE WATER TO SETTLE
Now we’re almost ready to start filming our first effect. We can allow the water in the tank to settle for a couple of minutes while preparing our cloud substance.
If you wait too long, the water layers will eventually mix you’ll miss the opportunity. Alternatively, the turbulence from removing the plastic sheet could create unique and interesting effects as well!
6. CREATE THE CLOUDS
Using either an insecticide sprayer or a large syringe and tube, we can inject the clouds into our top layer of fresh water. Fill your instrument with your paint or ink or milk and find a good position.
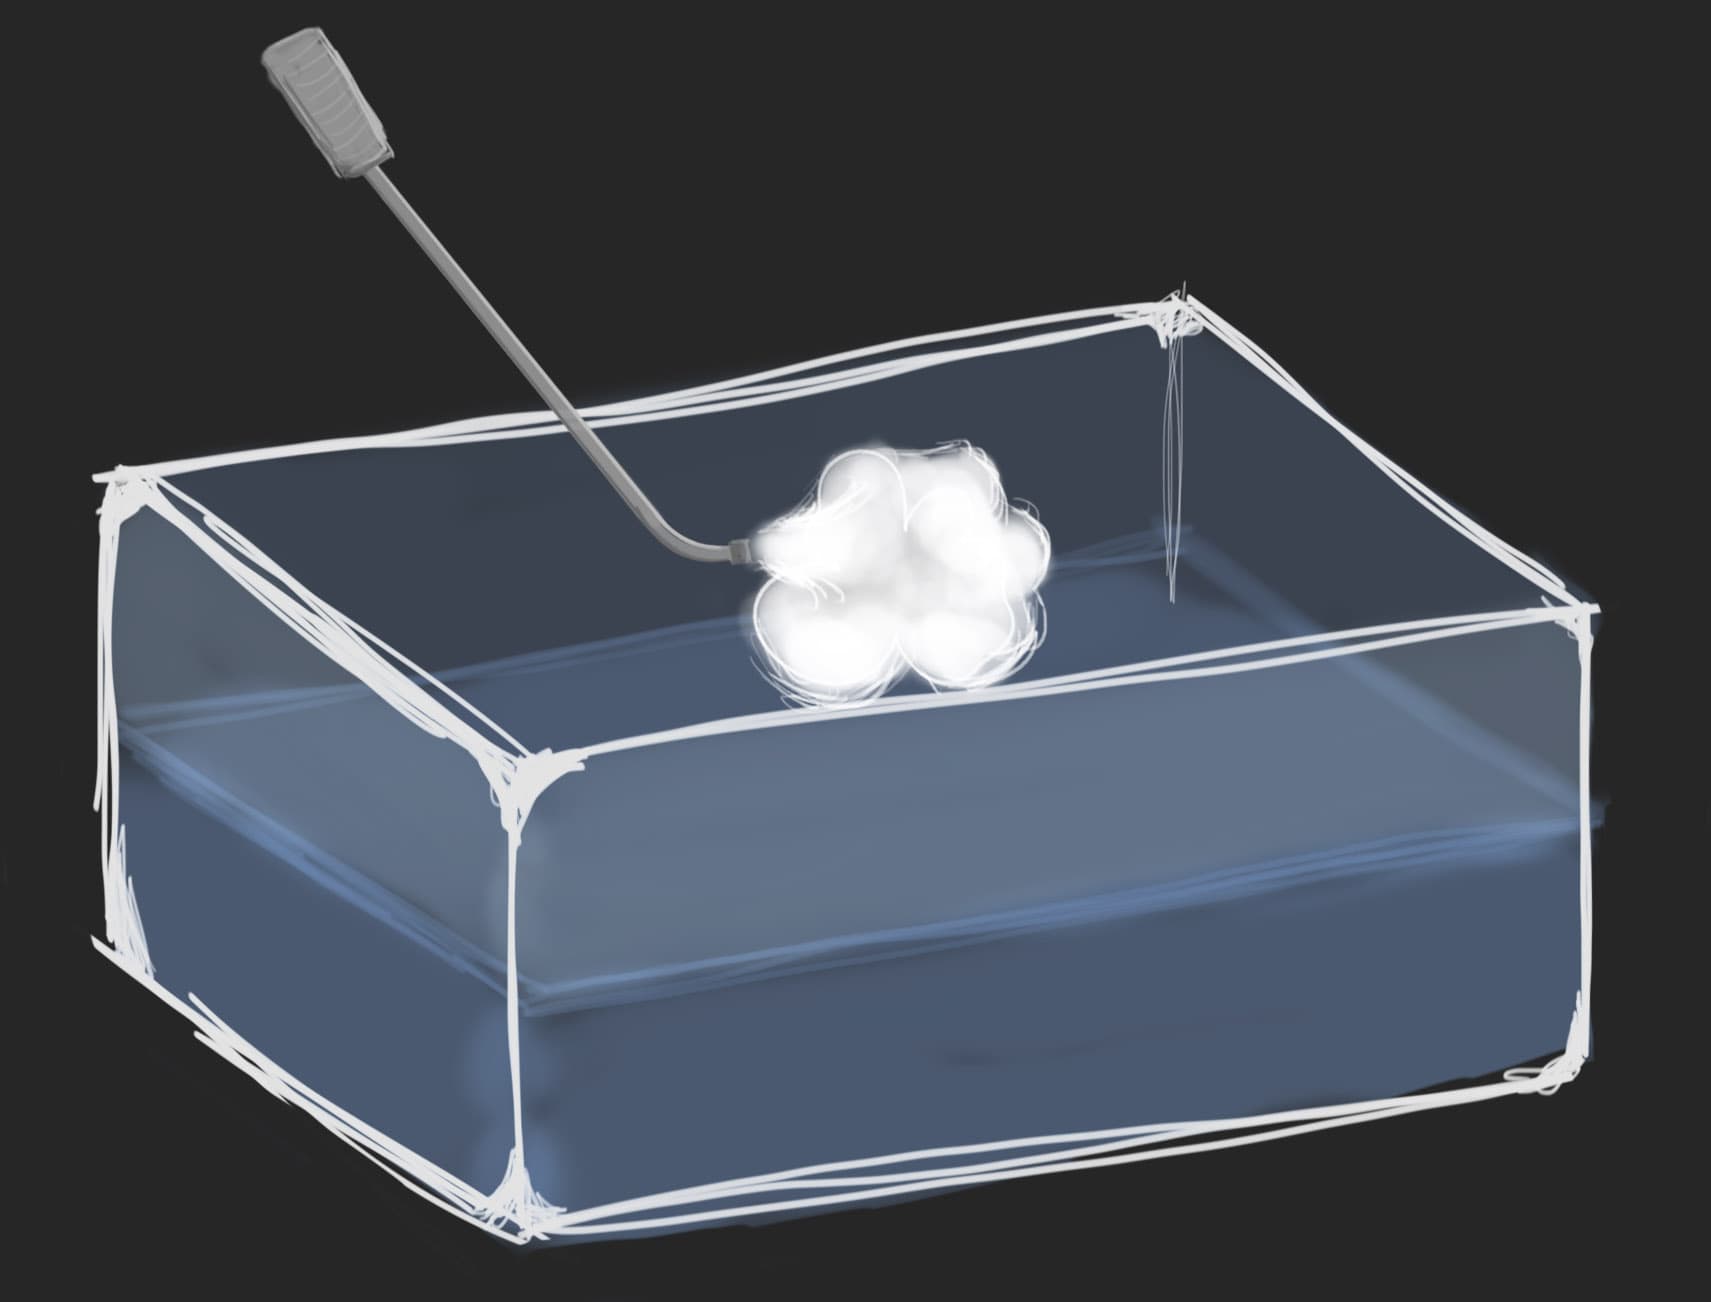
There’s no wrong way to go about this step. It all depends on the type of shot you’re trying to create. For example, the camera angle, lighting, and direction of the clouds will vary from project to project.
That said, here are a few tips:
- Have a cup of water on standby to rinse away any residual paint off the end of the sprayer before attempting your first take
- Release a little paint outside of the tank before starting to be sure that you expel any air bubbles from the tube.
- Do some experiments in a small pot/tub of water beforehand, and try to find the right amount of pressure/velocity
- Experiment with different types of “cloud fluid”. Common choices are ink, paint, and evaporated milk
With all of that in mind, take a deep breath, roll camera, and create some magic!
And now that you’ve filled the water tank with clouds, you’re all done, and you get to drain the tank and start all over for take 2! 🤦♂️
Additional Notes
Tendrils
From time to time, you’ll find that when the cloud fluid hits the salt water layer, it can create a sort of falling debris that looks a bit like the tendrils of a jellyfish. It’s hard to say what causes this side effect, but it appears related to impurities in the salt layer or clumps in the cloud fluid. Either way, additional filtering is needed.
Background color
Depending on the background plate and/or scene you are working on, you’ll need to decide on the background color. For example, if your background plate is a daytime shot with a blue sky, you’ll likely want to use a blue or green screen with your cloud tank. On the other hand, if your scene takes place at night, then shooting over black will be the fastest and easiest option.
Lighting
Again this will be primarily dictated by your background plate. However, there are some standard ideas to keep in mind. First, you’ll likely want to add a light under the aquarium or at least a bounce card. This is because, in reality, the earth serves as a giant bounce card for the sun’s light on the underside of all clouds.
To simulate lightning and/or the presence of spaceships, you can experiment with the use of fiber optics or small penlights that can be inserted into the cloud fluid to light the clouds from within.
Conclusion
As with all practical effects, some experimentation will be required, but honestly, that’s half the fun. And once you’ve got a hold of the basics, you can produce some truly magical results!